Physical Address
304 North Cardinal St.
Dorchester Center, MA 02124
Physical Address
304 North Cardinal St.
Dorchester Center, MA 02124

You know that Sunday feeling — the week is coming, the baby will need food every few hours, and you have exactly zero time to cook fresh meals every single day.
That was me six months into my baby’s solid food journey. I was making tiny batches of sweet potato puree at 7 PM after a full workday, blending carrots at breakfast, and generally losing my mind over what should be a simple task.
Then I figured out baby food Sunday meal prep.
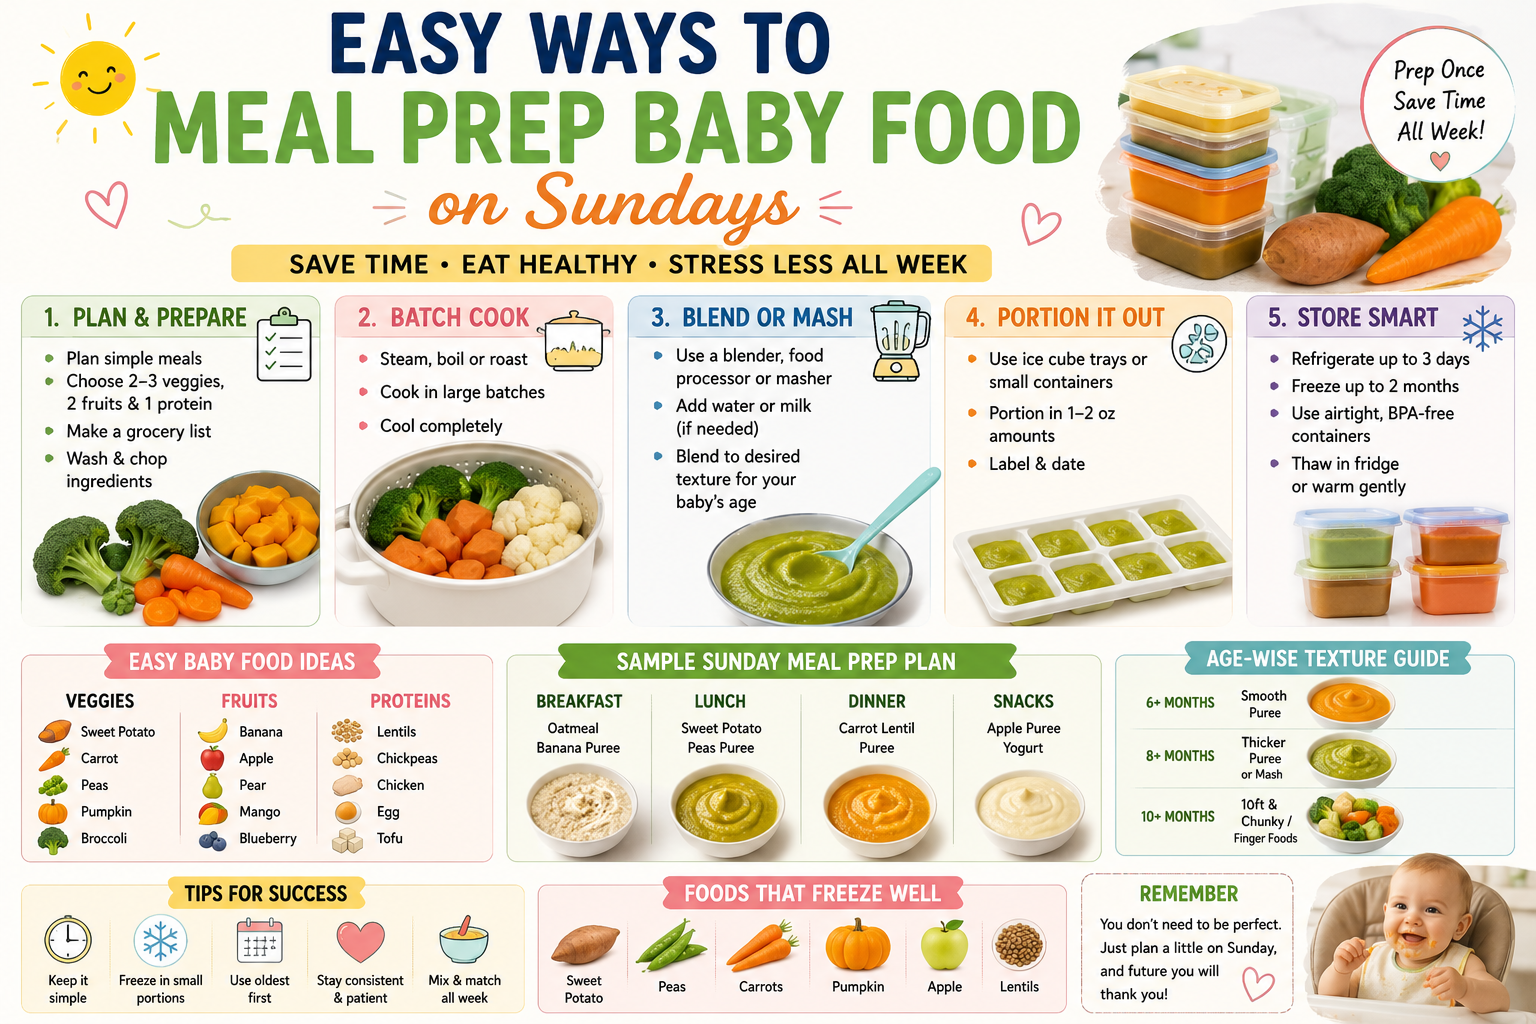
One hour. Every Sunday. That is it. By the time your coffee gets cold, you have a full week of baby food sitting in your freezer, labeled and ready to grab.
This guide covers everything you need to know — the tools, the Sunday schedule (broken into 15-minute blocks), age-specific foods from 6 to 12 months, safe storage rules, how to adapt family meals for your baby, and a free grocery list you can use this weekend.
No fluff. No complicated recipes. Just a real system that works for busy parents.
Baby food Sunday meal prep is the practice of batch cooking all of your baby’s food for the week in one dedicated session — usually on a Sunday — and storing it in the fridge or freezer. Instead of making fresh purees or soft foods every single meal, you cook once and serve all week.
The idea is simple. You use your oven, stovetop, and blender at the same time. You steam one thing while roasting another. You puree in batches. You portion into silicone trays or small jars. You label. Done.
A well-planned baby food meal prep session takes about 60 minutes and produces anywhere from 35 to 50 individual baby-sized portions, depending on your baby’s age and appetite.
For parents going back to work, managing multiple kids, or simply trying to reduce daily stress, batch cooking baby food is one of the highest-impact habits you can build in the first year of parenting.
💡 Quick Tip: Sunday works best because grocery shopping on Saturday means you have fresh produce ready to prep. Monday mornings go smoothly when the fridge is already stocked.
Let’s be honest. Daily baby food prep sounds great in theory. In practice, it means:
Meal prep for babies on one day per week solves all of this.
Here is what parents consistently report after switching to a Sunday batch system:
You save 5 to 7 hours per week. Daily cooking adds up fast. Washing, chopping, steaming, blending, cleaning — it is 30 to 45 minutes per day. Sunday prep takes 60 minutes total.
Your baby gets more variety. When prep is easy, you try more foods. When cooking daily, you default to whatever is fastest — usually the same 2 or 3 things every day.
Stress during the week drops dramatically. Mealtime becomes “open freezer, defrost, serve” instead of a full production. This matters enormously when your baby is cranky and hungry right now.
You waste less food. Buying in bulk and using everything in one session is far more efficient than buying small amounts daily and watching things go off in the crisper drawer.
Homemade baby food is fresher and cheaper. A bag of sweet potatoes costs less than a dollar per portion homemade versus four to five times that for commercial baby food pouches.
Before your baby food sunday meal prep session, gather everything first. Do not start cooking and then realize your blender jug is still in the dishwasher.
Steamer basket or steamer pot — The fastest way to cook vegetables for babies. Steaming preserves more nutrients than boiling. Any basic stovetop steamer works perfectly.
Blender or food processor — A regular blender works fine. Immersion blenders are excellent for small batches. Dedicated baby food makers like BEABA Babycook combine steaming and blending, but they are not necessary.
Silicone ice cube trays — These are the backbone of your freezer system. Each cube holds about 1 ounce (28ml), which is a perfect single serving for younger babies. Fill, freeze overnight, then pop the cubes out into labeled freezer bags. Choose trays with lids for easier stacking.
Small glass jars (4 oz / 120ml) — For fridge storage of the current 3-day supply. Ball Mason jars or similar work perfectly and are easy to clean.
Airtight freezer bags or containers — Once your cubes are frozen solid, transfer them to labeled freezer bags so you free up the trays for the next batch.
Permanent marker and labels — Always label with the food name and date. Frozen purees look identical after a week. You will not remember what that beige cube is.
Baking sheets — For roasting vegetables in the oven simultaneously while something steams on the stovetop.
Colander and vegetable brush — For proper washing of produce before cooking.
Keep it simple. Choose from this list based on your baby’s current stage:
Vegetables: sweet potato, butternut squash, carrot, peas, courgette (zucchini), broccoli, parsnip, spinach Fruits: apple, pear, mango, banana, blueberries, peach Protein: chicken thighs (boneless), red lentils, canned chickpeas (no added salt), eggs, full-fat Greek yogurt Grains: rolled oats (ground), quinoa, baby rice (optional for early stages)
Rule of thumb: Choose 2 to 3 vegetables, 1 protein, 1 grain, and 1 fruit per week. This gives your baby variety without overwhelming your prep session.
This is the section that most meal prep guides skip. They tell you to “batch cook” but never show you how to fit it into one hour. Here is a real timed schedule you can follow this Sunday.
Before you start: Preheat oven to 200°C (400°F). Clear your counter. Lay out your tools. Put on a podcast or playlist. This is actually quite satisfying once you get going.
The first 15 minutes is all prep work. Nothing goes on the heat yet.
This is the parallel cooking phase. Multiple things cook simultaneously — this is what makes it efficient.
Check at 30 minutes: Pierce the oven vegetables with a fork. They should go through with no resistance. The lentils should be completely soft and starting to break apart.
The final phase. This is where the week takes shape.
Total time: 55–65 minutes. That is your entire week of baby food done.
One of the biggest mistakes parents make is treating baby food prep the same at every age. What works for a 6-month-old is completely different from what a 10-month-old needs. Here is exactly what to prep and how to prepare it by stage.
At this stage, your baby is just getting started. Their gut is adjusting to solid food. You want one ingredient at a time so you can spot any allergic reactions or intolerances.
Best foods to batch cook:
Texture target: Completely smooth. If you hold a spoonful up and tip it, it should fall off the spoon slowly in one smooth ribbon. No lumps, strings, or chunks.
Portion size: Start with 1 to 2 tablespoons per meal. A 6-month-old eating solids for the first time will eat very little — milk is still their main nutrition at this stage.
Allergen introduction note: Introduce one new food every 3 to 5 days. This makes it easy to identify any reaction. Do not mix foods until your baby has tolerated each one separately.
Your baby’s chewing skills (even without many teeth) are developing fast. They can handle thicker textures and combined flavors.
What changes in your batch cook:
Best batch combinations:
Important: Avocado and banana are best prepared fresh. They go brown quickly and texture degrades in the freezer. Everything else in this list freezes well.
By 10 months, your baby is moving toward what you eat. They are developing pincer grip, exploring textures, and building the skills they need to join family meals.
What this means for your Sunday prep:
Great batch prep options:
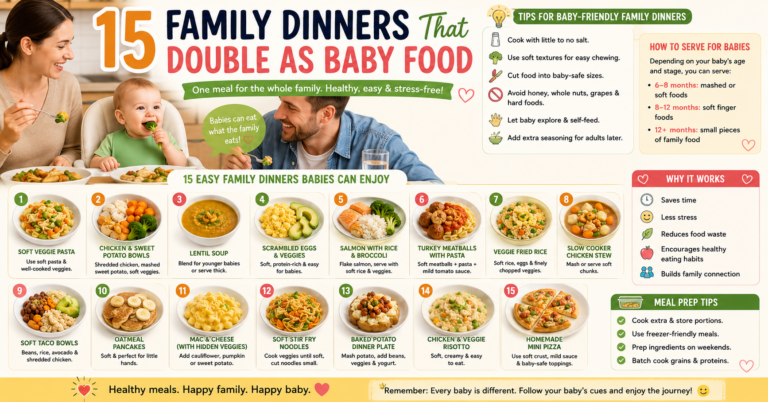
This is the market gap that almost no baby food blog covers properly. Every parent reaches a point where cooking two completely separate meals — one for the adults, one for the baby — becomes genuinely exhausting.
The solution is the family meal adaptation method. You cook one meal for everyone and adapt a portion for the baby before adding salt, strong spices, or other adult ingredients.
Here is how it works in practice:
Example 1 — Lentil soup Cook your normal family lentil soup. Before adding salt, take out a cup of soup. Blend the baby portion until smooth or leave slightly chunky depending on age. Serve the rest to adults, season as normal.
Example 2 — Stir-fry vegetables Steam or stir-fry vegetables in a little olive oil. Before adding soy sauce (high salt), set aside a portion for baby. Blend or mash the baby portion. Continue with the family meal.
Example 3 — Roast dinner When roasting vegetables for Sunday dinner, add extra to the tray. Take out the baby’s portion before it gets any seasoning or gravy. Blend smooth or cut into soft finger food pieces depending on age.
Example 4 — Pasta and tomato sauce Make your tomato pasta sauce. Blend the sauce smooth before adding cheese or seasoning. Freeze in ice cube portions. During the week, defrost a sauce cube, heat gently, serve over very soft pasta.
The rule: Season last. Set aside baby’s portion first. This applies to virtually any family meal you already cook.
This section could save your baby from a stomach upset. Homemade baby food has no preservatives, which means storage rules matter more than they do for commercial products.
| Food Type | Maximum Fridge Time |
|---|---|
| Fruit purees (apple, pear) | 2 days |
| Vegetable purees (carrot, sweet potato) | 2 days |
| Legume purees (lentil, chickpea) | 2 days |
| Meat or fish purees | 1 day only |
| Egg-based dishes | 1 day only |
| Grain-based (oat, rice) | 2 days |
| Mixed purees (veg + meat) | 1 day only |
Always refrigerate within 2 hours of cooking. If the food has been sitting at room temperature longer than 2 hours, discard it.
| Food Type | Maximum Freezer Time |
|---|---|
| Fruit and vegetable purees | 3 months |
| Legume purees | 3 months |
| Meat and fish purees | 1 month |
| Cooked grains | 1 month |
| Mixed purees | 1 month |
Label everything. A frozen green cube looks identical whether it is pea puree or courgette. Always write the food name and date on every bag and jar.
Most meal prep guides completely skip this. But if your baby is in the 6 to 12 month window, allergen introduction is happening at the same time as meal prepping — and you need a system for both.
The major allergens for babies are: peanuts, tree nuts, eggs, dairy, wheat, soy, fish, and shellfish.
How to track allergens during your Sunday prep:
Easy allergen-introduction foods that fit into batch prep:
Print this out or screenshot it before your Saturday shop. This list covers a full week of easy baby puree recipes for babies aged 6 to 10 months.
Vegetables:
Fruit:
Protein:
Grains:
Pantry:
1. Making too much variety in one session
It is tempting to prep 10 different foods. Resist this. Stick to 2 to 3 vegetables, 1 protein, and 1 grain. More variety means more cooking time, more equipment, and a messier session. Keep it manageable.
2. Not tasting the food yourself
Your baby cannot tell you the carrot is still slightly tough or the lentil puree tastes bitter because you overcooked it. Taste everything before you freeze it.
3. Freezing in large portions
Freezing a whole cup of puree means defrosting a whole cup — far more than your baby eats at one sitting. Always freeze in 1 to 2 ounce (28 to 55ml) cubes. Use silicone ice cube trays for this purpose specifically.
4. Skipping the label step
Happens to every parent at least once. You freeze an unlabeled green cube and 3 weeks later you have absolutely no idea what it is. Label every single container before it goes in the freezer. It takes 10 seconds.
5. Forgetting to defrost the night before
Sunday prep is wasted if you forget to move portions from the freezer to the fridge each evening. Build a simple habit: every night after dinner, move tomorrow’s portions to the fridge. Takes 30 seconds.
These are the five easy baby puree recipes that make the most of your Sunday hour. Each makes approximately 10 to 14 portions.
You need: 1 large sweet potato, 1 apple, water or formula to thin
How: Roast sweet potato (200°C / 25 min). Steam apple (10 min). Blend together with a splash of liquid. Freeze in cubes.
Why it works: Naturally sweet, easy to digest, iron-containing. Most babies love this combination.
You need: 3 large carrots, 100g red lentils, water
How: Steam carrots (15 min). Simmer lentils until completely soft (20 min). Blend together, adding cooking water to thin. Freeze in cubes.
Why it works: High in iron (important from 6 months when iron stores drop), protein-rich, and filling.
You need: 1 small butternut squash, 100g boneless chicken thigh, water or chicken stock (no salt)
How: Roast squash (200°C / 25 min). Boil chicken (20 min, discard water). Blend together. Thin to right consistency.
Why it works: Introduces meat protein early. Squash’s sweetness makes the chicken more palatable.
You need: 1 apple, 1 pear, 100g rolled oats (blended into flour), water or formula
How: Steam apple and pear (10 min). Blend fruit smooth. Cook oat flour in water for 5 minutes stirring constantly. Stir in fruit puree. Freeze in jars.
Why it works: Iron-fortified oats, naturally sweet fruit, great for breakfast all week.
You need: 150g broccoli, 150g frozen peas, 2 tbsp full-fat Greek yogurt
How: Steam broccoli and peas until very soft (12 min). Blend with yogurt. Do NOT freeze (dairy-based purees with yogurt are best fridge-stored and used within 2 days).
Why it works: Introduces dairy, packed with folate and vitamin C. A great green food introduction.
Yes, absolutely. Most cooked vegetables, fruits, grains, and meat purees freeze well for up to 3 months. Use silicone ice cube trays to freeze in 1-ounce portions, then transfer frozen cubes to labeled freezer bags. Dairy-based purees and dishes with yogurt are best kept in the fridge and used within 2 days.
A good rule of thumb: multiply your baby’s daily meals by 7, then add 10 to 20% extra for the days they are hungrier. At 6 months eating 2 small meals per day with 2 cubes each, that is 28 cubes per week minimum. At 10 months eating 3 meals per day, you may need 40 to 50 portions.
Fruit and vegetable purees last up to 2 days in the fridge. Meat, fish, and egg-based dishes should be used within 1 day. Mixed purees that contain meat or fish also last just 1 day. Always label with the date and keep covered in airtight jars.
Yes. A fork works well for soft foods like banana, avocado, well-cooked sweet potato, and ripe mango. A potato masher handles most steamed vegetables at the chunkier textures needed from 8 months onward. A blender gives the smoothest results but is not essential, especially for babies over 8 months who need more texture.
Avocado and banana are best prepared fresh daily — they brown quickly and texture suffers in the freezer. Dishes with large amounts of yogurt or soft cheese are better kept in the fridge and consumed within 2 days. Cucumber, raw tomato, and raw leafy greens should not be frozen.
Discard any food that smells off, has an unusual color change, or shows any frost buildup that indicates it has been partially thawed and refrozen. When in doubt, throw it out. Homemade baby food has no preservatives, so it is always better to be cautious.
You can start baby food sunday meal prep from the day your baby begins solid foods, which is usually around 6 months. Even if your baby is only eating 1 tablespoon twice a day, batch cooking prevents daily scrambling and helps you build the habit early before appetite grows.
Yes, significantly. A large sweet potato (about 400g) costs approximately 50p to 80p and produces 8 to 10 portions of puree. Commercial baby food pouches of the same size typically cost £1.50 to £2.50 each. The savings over 6 months of solid feeding are considerable.
Yes — this is actually the most efficient approach. When roasting vegetables for a family meal, add extra for the baby. When making soup, set aside a portion before adding salt. When cooking pasta sauce, blend a portion smooth and freeze it. This “cook once, serve twice” method is the most sustainable long-term approach to meal prep for babies.
No special baby-specific equipment is necessary. A regular blender or immersion blender, a steamer basket, silicone ice cube trays, and small glass jars cover everything you need. Dedicated baby food makers can be convenient but add cost and take up counter space. Standard kitchen equipment works just as well.
Here is the honest truth about baby food sunday meal prep: the first time you do it, it feels slightly chaotic. Things boil over. You forget to label something. You run out of trays. That is normal.
By the third Sunday, it is automatic. By the sixth Sunday, you will wonder how you ever managed any other way.
The parents who stick with Sunday batch cooking are not the ones with perfect kitchen setups or unlimited time. They are the ones who decided that one hour of focused effort is worth five hours of daily scrambling. That is all it is — a decision to do it differently.
Start this Sunday. Choose two vegetables, one protein, and one fruit from the grocery list above. Set a timer for 60 minutes. You will have your baby’s food sorted before lunch.
That is the whole system.
Baby food sunday meal prep is genuinely one of the most practical things you can do for your family in the first year of solid eating. One hour per week gives you stress-free weekday mornings, a wider variety of nutritious foods for your baby, real cost savings versus commercial pouches, and the confidence that your baby is eating well even on the hardest days.
Start with the basics — sweet potato, carrot, apple, and lentils. Nail the timing. Build your freezer stash. Then expand from there as your baby grows and their food needs change.
If you found this guide useful, bookmark it and come back as your baby moves through each age stage. The recipes and textures change, but the Sunday system stays the same.